You can ask questions about glide on Stack Overflow, using the tag glide-editor.
Or directly email questions/feedback/suggestions to: glide@64m.org
Contents
§
Glide is a polyglot, literate-programming editor with audio/visual output.
Glide documents can contain code and arbitrary text, images, videos, static and interactive HMTL content. Code can be evaluated directly from within the document. The evaluated result/value is inserted below the code, and can be textual, or audio/visual. A single document can contain any number of programming languages. And any language can be mixed/embedded with any other language and evaluated together (see Embedding/Mixing Multiple Languages).
The basic building block of a Glide document is an area – a rectangular region of the document that can contain content. Each Glide document is composed of a series of areas. One below another. All work you do, you do within an area.
You must insert an area in the document to add any content. A new Glide file provides a single empty generic area to start with.
• A generic area is used to write text, insert images and arbitrary HTML content.
• A program area is used to write code, to evaluate it and output its result.
• A scratch area is used for plain text.
• A Terminal area contains an xterm terminal which starts up with a login shell.
• And a JS area is a special kind of program area which evaluates it's code in the context of the Glide document itself. It's primary use is to output Audio/Visual values in the document.
Areas can be cut, copied, pasted, split and merged. Each area can also be styled independently, allowing changing widths, fonts, font-sizes and other formatting on a per area basis. (see Area Styling)
By default, Glide doesn't contain any pre-configured languages apart from JavaScript (see JS area). To run a language of your choice in Glide, you must configure it.
Configuring a language is trivial. Some Program Configurations lists configurations for a few popular languages. These can use be used directly (if the programming language of your choice is included), or as a template to understand how to configure a new language. Configuring Programs explains this in detail.
Glide ships with two default themes – Default Light and Default Dark. Depending on the OS preference, one of these will be set as default. You can define and set your own themes. See Custom Theming.
Nearly all commands have a keyboard shortcut associated with them. These default shortcuts can be overriden. See Overriding Shortcuts.
The Evaluating Code section details various ways to evaluate code in a program area, including JS area.
Throughout this document, the word program is used to mean three things: A REPL, a binary, or an OS process. Context should clarify which meaning applies. A REPL is a program that is an interactive language interpreter/compiler/runtime that waits to read input (code) from stdin, evaluates it, and prints it's result to stdout/stderr and waits for further input in a loop.
§
Glide can be configured using the file ~/.glide/config.hjson
This file is not automatically installed. You must do this yourself. See Initial Configuration
In most cases, you will want to at least configure what language/REPLs you wish to run. Glide's default shortcuts, themes and settings should be good enough for most use cases, but can also be customized using this same file.
The config file is watched for changes. All changes are effective immediately in the application without needing a restart.
If you haven't already, create the file ~/.glide/config.hjson
That's config.hjson file inside a folder called .glide (note the dot) in your home directory.
Note the extension is hjson. Not json. hjson is a human-friendly JSON format. It has features that allow for easy manual editing such as comments, multiline strings, bare property names etc. See the hjson site for details.
Copy the following stub to the config.hjson file and save it.
xxxxxxxxxx{ programs: [], themes: {}, settings: {}, shortcuts: []}To execute any code, you need to tell Glide about it. For any REPL you wish to run, you must create a program entry in the config file.
To configure using, say, Python, here is the program entry that needs to be added to the programs array.
xxxxxxxxxx{ id: "Python", command_name: "python3", shortcut: "mod+k p y", mode: "python", use_pty: true, pty_echo_off: true, prompt_regex: "^\\s*>>> $", input_suffix: " #endinput", last_value_fn: ''' return standard_last_value_extractor(arguments[0], '#endinput', true) '''},Now your config file should look like:
xxxxxxxxxx{ programs: [ { id: "Python", command_name: "python3", shortcut: "mod+k p y", mode: "python", use_pty: true, pty_echo_off: true, prompt_regex: "^\\s*>>> $", input_suffix: " #endinput", last_value_fn: ''' return standard_last_value_extractor(arguments[0], '#endinput', true) ''' }, ], themes: {}, settings: {}, shortcuts: []}Each program entry must specify at least an id and command_name. All other properties are optional.
Required Properties:
id
id can be any string, like "Clozure Common Lisp". It must be unique across all program entries. It's used internally to identify programs. It is also used as the menu entry for a program: Area > Insert > id.
Once set, changing this string isn't recommended. If you change it, documents that were created while the older id was configured, will no longer function correctly with the newer id. Choose the id carefully and stick with it.
command_name must be a string that is the name of the REPL/interpreter binary, or an absolute path to the binary, or a path to the binary relative to the cwd. Generally the name of the binary is enough as long as it's configured in your shell's path.
The command_name must refer to a binary that runs as a REPL, and doesn't just execute, print a result and quit. Such programs may run in Glide, but that's not what's expected and there are bound to be issues trying to run such programs.
Some programs have a REPL mode that is switched on by passing an argument (usually -i or --interactive). Refer to the program's manual for details.
Optional Properties:
shortcut
shortcut must be a valid shortcut string that defines the keyboard shortcut which when entered will insert the program area in the document. See valid shortcut strings.
This shortcut will override all other shortcuts like code-editor and terminal shortcuts.
mode
mode must be a string specifying the language-mode that the program area needs to enable syntax-highlighting and auto-indentation. If unspecified, mode will default to "text".
The mode string isn't always the name of the language. For instance the mode string for python is 'python' and for Common Lisp is 'commonlisp', but is "mllike" for OCaml and 'clike' for Scala. Here's a full list of supported languages (to the left) and their mode-name strings.
The mention of a language below doesn't imply that it can run successfully in Glide. This is just the list of all the languages that can be handled by the built-in code-editor for syntax-highlighting, indentation and other editing features. The caveat that the configured program must function as a REPL still holds.
APL : "apl"
ASN.1 : "asn.1"
Asterisk dialplan : "asterisk"
Brainfuck : "brainfuck"
C, C++, C# : "clike"
Ceylon : "clike"
Clojure : "clojure"
Closure Stylesheets (GSS) : "css"
CMake : "cmake"
COBOL : "cobol"
CoffeeScript : "coffeescript"
Common Lisp : "commonlisp"
Crystal : "crystal"
CSS : "css"
Cypher : "cypher"
Cython : "python"
D : "d"
Dart : "dart"
Django (templating language) : "django"
Dockerfile : "dockerfile"
diff : "diff"
DTD : "dtd"
Dylan : "dylan"
EBNF : "ebnf"
ECL : "ecl"
Eiffel : "eiffel"
Elm : "elm"
Erlang : "erlang"
Factor : "factor"
FCL : "fcl"
Forth : "forth"
Fortran : "fortran"
F# : "mllike"
Gas (AT&T-style assembly) : "gas"
Gherkin : "gherkin"
Go : "go"
Groovy : "groovy"
HAML : "haml"
Handlebars : "handlebars"
Haskell : "haskell"
Haskell Literate : "haskell-literate"
Haxe : "haxe"
HTML embedded (JSP, ASP.NET) : "htmlembedded"
HTML mixed-mode (script, style tags) : "htmlmixed"
HTTP : "http"
IDL : "idl"
Java : "clike"
JavaScript : "javascript"
JSX : "jsx"
Jinja2 : "jinja2"
Julia : "julia"
Kotlin : "clike"
LESS : "css"
LiveScript : "livescript"
Lua : "lua"
Markdown : "markdown"
GitHub-flavour Markdown : "gfm"
Mathematica : "mathematica"
mbox : "mbox"
mIRC : "mirc"
Modelica : "modelica"
MscGen : "mscgen"
MUMPS : "mumps"
Nginx : "nginx"
NSIS : "nsis"
N-Triples/N-Quads : "ntriples"
Objective C : "clike"
OCaml : "mllike"
Octave (MATLAB) : "octave"
Oz : "oz"
Pascal : "pascal"
PEG.js : "pegjs"
Perl : "perl"
PGP (ASCII armor) : "asciiarmor"
PHP : "php"
Pig Latin : "pig"
PowerShell : "powershell"
Properties files : "properties"
ProtoBuf : "protobuf"
Pug : "pug"
Puppet : "puppet"
Python : "python"
Q : "q"
R : "r"
RPM : "rpm"
reStructuredText : "rst"
Ruby : "ruby"
Rust : "rust"
SAS : "sas"
Sass : "sass"
Spreadsheet : "spreadsheet"
Scala : "clike"
Scheme : "scheme"
SCSS : "css"
Shell : "shell"
Sieve : "sieve"
Slim : "slim"
Smalltalk : "smalltalk"
Smarty : "smarty"
Solr : "solr"
Soy : "soy"
Stylus : "stylus"
SQL (several dialects) : "sql"
SPARQL : "sparql"
Squirrel : "clike"
Swift : "swift"
sTeX, LaTeX : "stex"
Tcl : "tcl"
Textile : "textile"
Tiddlywiki : "tiddlywiki"
Tiki wiki : "tiki"
TOML : "toml"
Tornado (templating language) : "tornado"
troff (for manpages) : "troff"
TTCN : "ttcn"
TTCN Configuration : "ttcn-cfg"
Turtle : "turtle"
Twig : "twig"
VB.NET : "vb"
VBScript : "vbscript"
Velocity : "velocity"
Verilog/SystemVerilog : "verilog"
VHDL : "vhdl"
Vue.js app : "vue"
Web IDL : "webidl"
WebAssembly Text Format : "wast"
XML/HTML : "xml"
XQuery : "xquery"
Yacas : "yacas"
YAML : "yaml"
YAML frontmatter : "yaml-frontmatter"
Z80 : "z80"
command_args
This is an array of strings. Each string being an argument to the command_name.
e.g. Steel Bank Common Lisp can load a script on startup with a --load argument.
This can be specified in the program entry as:
xxxxxxxxxxcommand_args: ["--load", "path/to/script.lisp"]cwd specifies the current working directory for the program. Must be a string containing path to a directory. If unspecified, cwd defaults to the install directory of Glide.
use_shell
Certain programs will always expect a shell. Or you may want to pass arguments that can only be processed by the shell. When in doubt, set this to true. Must be a Boolean value. Defaults to false.
use_pty
Boolean. Default value is false. Setting this to true makes the REPL process behave as if it were running in a terminal by attaching it to a pseudo terminal (pty).
With use_pty and use_shell properties, you can run a program in 4 modes.
1 A simple program with no shell or tty.
2 With a shell but no tty.
3 With a tty and no shell.
4 With a shell and tty.
Each REPL requires a specific combination to work correctly. In general, 4 (shell + tty) should work for all programs. But there is a slight speed advantage when not using a shell or tty. Unfortunately most REPLs misbehave and make assumptions about their execution environment in such a way that running programs as simple processes doesn't always work. Some programs behave as if they are communicating with a terminal even if they are not being run in the terminal.
A good example is Node.js. Running it without setting use_pty to true, outputs uninterpreted control sequences meant to be processed by a tty. Not what you want. Setting use_pty to true will produce the expected output.
pty_echo_off
Boolean. Default values is false.
This indicates to the program whether to echo input back along with the output. Doesn't work for all programs. Some programs ignore this directive. Try and see if it works for your particular program.
String. Default value is "".
If specified, on each evaluation this string is attached to the start of code before sending it to the program for evaluation. This in conjunction with input_suffix is useful to surround your code for e.g. in an anonymous block, or an async function.
input_suffix
String. Default value is "".
If specified, on each evaluation this string is attached to the end of code before sending it to the program for evaluation.
prompt_regex
A string specifying a regex that will match the entire empty prompt line for the REPL. This is necessary only if you intend to embed/mix this language with another language. This is also needed if want to output values audio/visually, which implies embedding in a JS area. See Some Program Configurations for examples.
last_value_fn
String. Default value is "return false".
The contents of this string are used as the source code for a function of one argument. This function is used to extract the last evaluated value from the output of any program. This is only necessary if you wish to embed this program. See Embedding/Mixing Multiple Languages.
Here's an example for extracting the last evaluated value from Clozure Common Lisp.
xxxxxxxxxxlast_value_fn: ''' let output = arguments[0] let lines = output.split('\n') // remove last line, since that is always the prompt. // and reverse for ease let rev_lines = lines.slice(0, lines.length - 1).reverse() let out = [] for (let line of rev_lines){ let match = line.match(/(^\d+\s*\>|^\s*\?)(.*?)$/) // line starts with ccl prompt if (match){ out.push(match[2].trim()) break }else{ // dont trim start to preserve any indentation. // but trim end to remove extra spaces that come from running in a terminal. out.push(line.trimEnd()) } } return out.reverse().join('\n')'''Note the triple single quote. ''' delimits a multiline string in hjson.
The contents are what would be the source for a JavaScript function. You can access the output from the arguments object. Since only one value is passed to the function you can always use arguments[0].
This function removes the last line, which is the prompt. Then looks in reverse for a line that starts with a prompt (that is how Clozure Common Lisp outputs its evaluated values). And then extracts the relevant bit.
This is such a common pattern to extract last values, that there is a Glide built-in JavaScript function that allows doing this easily. The function above could just as easily have been specified thus:
xxxxxxxxxxlast_value_fn: ''' return standard_last_value_extractor(arguments[0], "^\\d+\\s*\\>|^\\s*\\?", true)'''The function standard_last_value_extractor is a built-in convenience function that expects three parameters. First is the text to extract from. This is always arguments[0].
The second specifies a regex that should match part of the output that indicates start of the last value. Usually a regex that matches the REPL prompt. But this is not always the case. (See Some Program Configurations).
The third is an optional boolean parameter that specifies whether to trim any starting space from the extracted last_value. By default this is false. Certain languages like Python expect certain indentation. For languages that don't, you can set this to true (mostly this is the case.).
Here's a list of program configurations that are known to work for certain languages/runtimes.
If you have difficulty configuring a REPL that isn't listed here, you can email glide@64m.org with the subject program-config.
xxxxxxxxxxClozure Common Lisp{ id: "Clozure Common Lisp", command_name: "cclq", shortcut: "mod+k l i", last_value_fn: ''' return standard_last_value_extractor(arguments[0], "^\\d+\\s*\\>|^\\s*\\?", true) ''' mode: "commonlisp", prompt_regex: "^(inspect>|\\d+ >|\\?) $",}Steel Bank Common Lisp{ id: "Steel Bank Common Lisp", command_name: "sbcl", use_pty: true, cwd: "~/Desktop", pty_echo_off: true, shortcut: "mod+k s t", mode: "commonlisp", prompt_regex: "^(>|\\d+]|\\*) $", last_value_fn: ''' return standard_last_value_extractor(arguments[0], "^\\d+\\s*\\]|^\\s*\\*", true) '''}Julia{ id: 'Julia', shortcut: 'mod+k j u', command_name: 'julia', use_pty: true, input_prefix: "\n", input_suffix: " #endinput", cwd: '~/Desktop', mode: 'julia', prompt_regex: "^[\\d\\w\\s_-]{0,20}> $", last_value_fn: ''' return standard_last_value_extractor(arguments[0], '#endinput', true) ''',}Python{ id: "Python", command_name: "python3", use_pty: true, pty_echo_off: true, input_suffix: " #endinput", shortcut: "mod+k p y", prompt_regex: "^\\s*>>> $", last_value_fn: ''' return standard_last_value_extractor(arguments[0], '#endinput', true) ''', mode: "python"}APL{ id: "APL", command_name: "apl", use_pty: true, use_shell: true, shortcut: "mod+k a p", mode: "apl", input_prefix: " " // this helps with aligning content input_suffix: " ⍝ ENDINPUT", prompt_regex: "^ $", last_value_fn: ''' return standard_last_value_extractor(arguments[0], "⍝ ENDINPUT", true) '''}MIT Scheme{ id: 'Scheme', shortcut: 'mod+k s h', command_name: 'scheme', use_pty: true, cwd: '~/Desktop', mode: 'scheme', prompt_regex: "^\\d (]=|error)> $", last_value_fn: ''' return standard_last_value_extractor(arguments[0], "^;Value.*?\\:\\s", true) ''',}Ruby{ id: 'Ruby', shortcut: 'mod+k r u', command_name: 'irb', use_pty: true, cwd: '~/Desktop', mode: 'ruby', prompt_regex: "^irb.*?> $", last_value_fn: ''' return standard_last_value_extractor(arguments[0], "^=>", true) ''',}Smalltalk{ id: 'Smalltalk', shortcut: 'mod+k s m', command_name: 'gst', use_pty: true, input_suffix: " \"endinput\"", cwd: '~/Desktop', mode: 'smalltalk', prompt_regex: "^st> $", last_value_fn: ''' return standard_last_value_extractor(arguments[0], '"endinput"', true) ''',}GNU Forth{ id: 'Forth', shortcut: 'mod+k f o', command_name: 'gforth', input_suffix: " ( endinput ) ", cwd: '~/Desktop', mode: 'forth', prompt_regex: "^$", last_value_fn: ''' let match = arguments[0].match(/\(\sendinput\s\)\s*(.*?)\s*ok\s*$/s) if (match){ return match[1].trim() }else{ return "" } ''',}Lua{ id: 'Lua', shortcut: 'mod+k l u', command_name: 'lua', use_pty: true, input_suffix: " --endinput", cwd: '~/Desktop', prompt_regex: "^> $", mode: 'lua', last_value_fn: ''' return standard_last_value_extractor(arguments[0], '--endinput', true) ''',}Scala{ id: 'Scala', shortcut: 'mod+k s c', command_name: 'scala', use_pty: true, cwd: '~/Desktop', mode: 'clike', prompt_regex: "^scala> $", last_value_fn: ''' return standard_last_value_extractor(arguments[0], '^val.*?\\:.*?\\=', true) ''',}OCaml{ id: 'OCaml', shortcut: 'mod+k o c', command_name: 'ocaml', cwd: '~/Desktop', mode: 'mllike', prompt_regex: "^# $", last_value_fn: ''' return standard_last_value_extractor(arguments[0], '^.*?\\:.*?\\=', true) ''',}Node JS{ id: "Node JS", shortcut: "mod+k n o", command_name: "node", cwd: "~/Desktop", use_pty: true, // pty_echo_off: true, // is ignored by node anyway input_prefix: "", input_suffix: " //endinput", prompt_regex: "^> $", last_value_fn: ''' return standard_last_value_extractor(arguments[0], '\\/\\/endinput', true) ''', mode: "javascript"}§
A theme controls all of the visual aspects of Glide including width, fonts, font sizes, and various colors.
To create a custom theme you must add it to the "themes" dictionary in the config file.
xxxxxxxxxxthemes: { 'Custom theme': { bg: '#442200' code-bg: 'blue' }}The above example will create a theme named "Custom theme". It customizes just the background color of text and program areas. There are many other properties that can be customized (a full list follows below). But you can selectively customize just what you need, and the rest of the properties will be taken from the "Default Light" theme. See default configuration to view the default themes.
Once you've created a theme, it can be selected from the menu View > Theme > Custom Theme. This change will be temporary, only lasting for a particular session and you will need to choose the theme on every app restart. To permanently set a theme, you can set it in "settings" in the config file. Make sure to use the exact name string that was used when adding it to the themes dictionary.
xxxxxxxxxxsettings: { "theme": 'Custom theme'}This setting also supports a special value: "system". When set to this, the theme reflects the system preference for a light or dark theme. Two additional settings "system-dark-theme" and "system-light-theme" control which theme is activated.
xxxxxxxxxxsettings: { "theme": "system", "system-dark-theme": "Oberst and Buchner", "system-light-theme": "Electric Light Orchestra",}With the above settings, if the host OS switches to dark mode, the theme "Oberst and Buchner" will become active. Otherwise the theme "Electric Light Orchestra" will be active. "system-dark-theme" defaults to "Default Dark", and "system-light-theme" to "Default Light" if unspecified or if Glide can't file these themes in the "themes" dictionary.
Here are all the properties that a theme can specify. All properties can be set using valid CSS values. So for colors, values can be of the form "#2d2d2d", "red", "rgba(10, 20, 10, 0.1) etc; or for sizes: "10px", "1.35em", "200%" etc.
"bg" - Document background color.
"text" - Document text color.
"highlight" - Selection highlight color.
"lines" - Area Info et al separator color.
"link" - Link color.
"secondary-text" - Input section for Program Area et al color.
"secondary-highlight" - Search and replace et al highlight color.
"default-area-width" - Default document/area width.
"font-family" - Text font.
"font-size" - Text font size.
"small-font-size" - Input section et al font size.
"code-bg" - Program area background color.
"code-text" - Program area text color.
"code-string" - Syntax highlighting color for code strings.
"code-number" - Syntax highlighting color for code number literals.
"code-comment" - Syntax highlighting color for code comments.
"code-keyword" - Syntax highlighting color for code keywords.
"code-name" - Syntax highlighting color for code variable and function declarations.
"code-caret" - Program area caret color
"code-selection" - Program area selection highlight color.
"code-font-family" - Program area font.
"code-font-size" - Program area font-size.
"terminal-theme" - Name of an xterm-theme. (without the .js extension)
"terminal-bg" - Terminal background color.
"terminal-font" - Terminal font.
"logger-bg" - Log background color.
"logger-text" - Log text color.
Nearly all of Glide can be operated using keyboard shortcuts, and nearly all shortcuts can be overriden.
You can override shortcuts listed in the "shortcuts" dictionary in the the default configuration. Some shortcuts such as those that open files, close files, undo, redo etc. are not overridable, but these are very few.
In general, the commands that have a shortcut mentioned next to their menu entry have fixed shortcuts. Commands with menu entires that mention no shortcut, do in fact have associated shortcuts, and these shortcuts can be overriden.
xxxxxxxxxxshortcuts: [ { "shortcut": "mod+1", "function": "program-eval.eval_area" }, { "shortcut": "shift+esc", "function": "program-area.toggle_wrap" }]The above example overrides the "Eval Area" shortcut, replacing it's default shortcut Command E on Mac and Ctrl E otherwise, with Command 1 on Mac and Ctrl 1 otherwise. It also sets the "Toggle Line Wrapping" shortcut to Shift Esc.
The "function" property is the internal name for a particular command, and must appear exactly as listed in the default configuration for the shortcut to function correctly. And the "shortcut" property must be a valid shortcut string.
A shortcut string specifies either a shortcut combination or a shortcut sequence.
A shortcut combination is specified as (optional) modifier/s and a key interspersed with +.
e.g. "shift+ctrl+8" or "shift+command+k" or even just "enter" or "x".
A shortcut sequence is specified as any sequence of keys and shortcut combinations interspersed with a space.
e.g. "cmd+j u", which will trigger when Command and j are pressed followed by the u key.
Even "up down left right ctrl+d" is a valid sequence.
A sequence resets if there is an interval larger than 1 second between successive inputs.
Valid modifier keys are shift, ctrl, alt or option, and meta or command.
Other special keys are backspace, tab, enter, return, capslock, esc, escape, space, pageup, pagedown, end, home, left, up, right, down, ins, del, and plus.
You can use the special key "mod" which refers to the command key on a Mac and ctrl key otherwise.
The default configuration for Glide, uses it exclusively in place of cmd or ctrl.
All other keys can be specified literally.
§
Areas are rectangular regions of the document that can contain specific types of content. Each type of area has it's own set of commands.
Area commands can be accessed from the Area menu. The associated shortcuts can be looked up in the "shortcuts" dictionary in the default configuration.
Areas can be cut, copied and pasted. Cut Area removes the current area from the document and places it on a special area clipboard. Cutting an area differs from copying in that it can only be pasted once. Copy Area places a copy of the current area on the clipboard. Terminal areas cannot be copied. Paste Area pastes an area that is on the clipboard at the current caret position, pushing down whichever area is at that location. If the area on the clipboard was placed by cutting, then the pasting can occur just once. If the area was copied, pasting can occur multiple times.
Areas can be split and merged using Split Area, Merge Area Above, Merge Area Below as long as they are of the exact same type. Terminal areas cannot be split or merged.
Go To Next Area, Go To Previous Area, Go To First Area and Go To Last Area help navigate across areas.
Every area (except terminals) can be individually formatted/styled.
Styling commands can be found under the menu Area > Style.
Area width can be modified using the commands Increase Width and Decrease Width. These modify the area width 50 pixels at a time. Full Width makes the area width as small or as large as the window width. Default Width resets the area width to the overall document width.
Note: Overall document width (which affects all areas) can be modified by Increase Document Width, Decrease Document Width and Reset Document Width commands found under the View menu.
Text can be aligned using Align Left, Align Right, Align Center and Justify.
Font sizes can be modified using Increase Font Size and Decrease Font Size. Default Font Size resets the area's font size to the size set by the current active theme.
Generic Areas can have multiple columns of text. This is achieved using Increase Column Count and Decrease Column Count.
Program areas, JS areas, and scratch areas by default use the code font set by the theme. And generic areas use the text font. This can be switched by explicitly setting which font you wish to use for that area with Use Code Font and Use Text Font.
All of the above commands change the style of an area, and at any point, you can revert to that area's original style by using Switch to Default Style. And it's counter part: Switch to Custom Style can switch back to the customized style.
A generic area can contain text and other rich media. You can paste images, links and other formatted HTML directly into it. A generic area can be inserted into the document from the menu Area > Insert > Generic, or it's associated shortcut.
Pasting anything in a generic area will preserve it's format. To paste as plain text without formatting you can use the command Paste as Text.
NOTE: Mod is not a real key. It is intended to mean the Command key on a Mac and the Ctrl key otherwise.
To bold text, select it and use the shortcut Mod B.
Mod I will italicize selected text.
You can paste links directly into a generic area. But because these links are editable, clicking on a link simply moves the caret over it for editing purposes. To navigate to the URL that a link points to, place the caret anywhere on the link and enter Shift Alt Mod L.
Adding links is a bit tricky. But easy once you understand how to do it. To add a link, first paste the URL you want. Then select the pasted URL text and enter Shift Mod L. This will create a link to that URL. Once this is done, you may edit the text of the link and it will still point to the original URL.
Additionally, you can create links that point to places within the Glide document itself (like most of the links on this page). To do this, select any text and enter the shortcut: Shift Mod L. This will create a named link. Then, you need to create a named attribute which will be the target for the link. Say, you created a link called example link. Select the same text elsewhere in the document (ignoring letter case and whitespace) and enter the shortcut Shift Mod N. This is now the target for that link.
Activating the example link above should make the document jump to the following location:
A Program area contains a code-editor for a specific language, and it's REPL/interpreter. Evaluated code is output to the area's result section. The area also contains an input section to communicate interactively with the REPL. The input section is hidden by default and it's diplay can be toggled from the menu View > Toggle Program Input.
You must configure each REPL you wish to work with before the program area becomes available in Glide (See Configuring Programs). Once Configured, a particular program area can be inserted from the menu Area > Insert > Program ID, or it's configured shortcut.
A program area will highlight the syntax for it's configured language mode, and offer auto indentation.
The code editor in the program area has it's own set of shortcuts and features. The following lists commands and the associated shortcuts that the code-editor supports. These shortcuts are currently not configurable.
Mac
"Cmd-Left": "goLineStartSmart",
"Shift-Tab": "indentLess",
"Shift-Ctrl-K": "deleteLine",
"Alt-Q": "wrapLines",
"Ctrl-Left": "goSubwordLeft",
"Ctrl-Right": "goSubwordRight",
"Ctrl-Alt-Up": "scrollLineUp",
"Ctrl-Alt-Down": "scrollLineDown",
"Cmd-L": "selectLine",
"Shift-Cmd-L": "splitSelectionByLine",
"Esc": "singleSelectionTop",
"Cmd-Enter": "insertLineAfter",
"Shift-Cmd-Enter": "insertLineBefore",
"Cmd-D": "selectNextOccurrence",
"Shift-Cmd-Space": "selectScope",
"Shift-Cmd-M": "selectBetweenBrackets",
"Cmd-M": "goToBracket",
"Cmd-Ctrl-Up": "swapLineUp",
"Cmd-Ctrl-Down": "swapLineDown",
"Cmd-/": "toggleCommentIndented",
"Cmd-J": "joinLines",
"Shift-Cmd-D": "duplicateLine",
"F5": "sortLines",
"Shift-F5": "reverseSortLines",
"Cmd-F5": "sortLinesInsensitive",
"Shift-Cmd-F5": "reverseSortLinesInsensitive",
"F2": "nextBookmark",
"Shift-F2": "prevBookmark",
"Cmd-F2": "toggleBookmark",
"Shift-Cmd-F2": "clearBookmarks",
"Alt-F2": "selectBookmarks",
"Backspace": "smartBackspace",
"Cmd-K Cmd-D": "skipAndSelectNextOccurrence",
"Cmd-K Cmd-K": "delLineRight",
"Cmd-K Cmd-U": "upcaseAtCursor",
"Cmd-K Cmd-L": "downcaseAtCursor",
"Cmd-K Cmd-Space": "setSublimeMark",
"Cmd-K Cmd-A": "selectToSublimeMark",
"Cmd-K Cmd-W": "deleteToSublimeMark",
"Cmd-K Cmd-X": "swapWithSublimeMark",
"Cmd-K Cmd-Y": "sublimeYank",
"Cmd-K Cmd-C": "showInCenter",
"Cmd-K Cmd-G": "clearBookmarks",
"Cmd-K Cmd-Backspace": "delLineLeft",
"Cmd-K Cmd-1": "foldAll",
"Cmd-K Cmd-0": "unfoldAll",
"Cmd-K Cmd-J": "unfoldAll",
"Ctrl-Shift-Up": "addCursorToPrevLine",
"Ctrl-Shift-Down": "addCursorToNextLine",
"Cmd-F3": "findUnder",
"Shift-Cmd-F3": "findUnderPrevious",
"Alt-F3": "findAllUnder",
"Shift-Cmd-[": "fold",
"Shift-Cmd-]": "unfold",
"Cmd-I": "findIncremental",
"Shift-Cmd-I": "findIncrementalReverse",
"Cmd-H": "replace",
"F3": "findNext",
"Shift-F3": "findPrev"
PC
"Shift-Tab": "indentLess",
"Shift-Ctrl-K": "deleteLine",
"Alt-Q": "wrapLines",
"Ctrl-T": "transposeChars",
"Alt-Left": "goSubwordLeft",
"Alt-Right": "goSubwordRight",
"Ctrl-Up": "scrollLineUp",
"Ctrl-Down": "scrollLineDown",
"Ctrl-L": "selectLine",
"Shift-Ctrl-L": "splitSelectionByLine",
"Esc": "singleSelectionTop",
"Ctrl-Enter": "insertLineAfter",
"Shift-Ctrl-Enter": "insertLineBefore",
"Ctrl-D": "selectNextOccurrence",
"Shift-Ctrl-Space": "selectScope",
"Shift-Ctrl-M": "selectBetweenBrackets",
"Ctrl-M": "goToBracket",
"Shift-Ctrl-Up": "swapLineUp",
"Shift-Ctrl-Down": "swapLineDown",
"Ctrl-/": "toggleCommentIndented",
"Ctrl-J": "joinLines",
"Shift-Ctrl-D": "duplicateLine",
"F9": "sortLines",
"Shift-F9": "reverseSortLines",
"Ctrl-F9": "sortLinesInsensitive",
"Shift-Ctrl-F9": "reverseSortLinesInsensitive",
"F2": "nextBookmark",
"Shift-F2": "prevBookmark",
"Ctrl-F2": "toggleBookmark",
"Shift-Ctrl-F2": "clearBookmarks",
"Alt-F2": "selectBookmarks",
"Backspace": "smartBackspace",
"Ctrl-K Ctrl-D": "skipAndSelectNextOccurrence",
"Ctrl-K Ctrl-K": "delLineRight",
"Ctrl-K Ctrl-U": "upcaseAtCursor",
"Ctrl-K Ctrl-L": "downcaseAtCursor",
"Ctrl-K Ctrl-Space": "setSublimeMark",
"Ctrl-K Ctrl-A": "selectToSublimeMark",
"Ctrl-K Ctrl-W": "deleteToSublimeMark",
"Ctrl-K Ctrl-X": "swapWithSublimeMark",
"Ctrl-K Ctrl-Y": "sublimeYank",
"Ctrl-K Ctrl-C": "showInCenter",
"Ctrl-K Ctrl-G": "clearBookmarks",
"Ctrl-K Ctrl-Backspace": "delLineLeft",
"Ctrl-K Ctrl-1": "foldAll",
"Ctrl-K Ctrl-0": "unfoldAll",
"Ctrl-K Ctrl-J": "unfoldAll",
"Ctrl-Alt-Up": "addCursorToPrevLine",
"Ctrl-Alt-Down": "addCursorToNextLine",
"Ctrl-F3": "findUnder",
"Shift-Ctrl-F3": "findUnderPrevious",
"Alt-F3": "findAllUnder",
"Shift-Ctrl-[": "fold",
"Shift-Ctrl-]": "unfold",
"Ctrl-I": "findIncremental",
"Shift-Ctrl-I": "findIncrementalReverse",
"Ctrl-H": "replace",
"F3": "findNext",
"Shift-F3": "findPrev"
See Evaluating Code to understand how to evaluate program area code.
To communicate directly with a program area's REPL, you can it's input section. This is hidden by default and can be shown using Toggle Program Input command under the View menu.
Input sections allow interrupting programs using SIGINT (usually Ctrl-C) and SIGTERM (usually Ctrl-D). They also retain input history which can be navigated with up, down keys.
A scratch area is a plain text area. Unlike a generic area, it cannot contain any formatting or rich media. It does offer a much richer set of text editing features than a generic area. In fact, a scratch area contains the same code-editor as a program area. But, unlike a program area, a scratch area doesn't have any associated REPL and it's contents cannot be evaluated. See Program Area for the code-editor commands.
You can insert a scratch area from the menu Area > Insert > Scratch, or it's associated shortcut.
A JS area is special area in Glide. It is the interface that allows you to control and communicate with the Glide document directly. Each Glide document is essentially a full HTML DOM. A JS area allows you to execute arbitrary JavaScript in the context of this HTML DOM. It's important to note that a Glide document is not just a web page. There are important differences that simultaneously make it tremendously capable, and dangerous to use if you are not careful.
The first important difference is that a Glide document doesn't enforce security restrictions like a web page in a browser. This is because Glide is a programming tool and runs locally. It's assumed that you know what you're doing. So it allows you to easily run scripts from any domain directly within the document. And you can load (mostly) any piece of content from the web within the document.
The second difference is that you can access your local system resources using Node.js which is preloaded into the document. So you can read local files, or use OS level features. For example:
xxxxxxxxxxconst os = require('os')console.log(os.type(), os.release())os.cpus().lengthDarwin 19.6.0
8
8
These features mean that there is nothing stopping you from clobbering the entire contents of the document with an errant piece of code. This may seem like a bad design choice, but it really isn't. Allowing YOU to have control over the page means you can do things with a Glide document that simply wouldn't be possible otherwise. Like creating full blown applications within the document. It also allows you to execute disparate pieces of code written in separate JS areas in a single context allowing shared state. This is a convenience worth having.
There are 2 convenience functions (in addition to the DOM level JS API + Node.js API) available that allow easy loading of local and remote scripts.
1 load_script(url, do_fn = () => {})
load_script downloads the resource located at url and inserts it as a script element within the document. do_fn is the optional callback called after the script element is loaded. It is passed a single parameter - the loaded script element.
2 load_script_local(path)
Given a path to a local script file, load_script_local reads the file, and inserts it as a script element within the document. Runs Synchronously.
The main purpose of a JS area is to allow the language of your choice to have a DOM frontend.
This makes any language capable of producing rich output, irrespective of it's inherent capabilities. You do all your computation with your language/environment in its program area and then when you need rich output, just embed it in a JS area. If the result of evaluating a JS area is a DOM Node, it is inserted directly in the document. This allows you to evaluate any piece of embedded code in any language, and then output it audio/visually as a DOM Node.
The example on the Glide homepage demonstrates this quite nicely. Here it is again:
xxxxxxxxxxlet dim = [julia string( [python3 10 + [sbcl (reduce #'+ ; Generate 1 2 3 4 5 6 7 8 9 10 (list [apl x[⍋x←10?10] apl])) sbcl] # add 1 2 3 4 5 6 7 8 9 10 = 55 python3], # 10 + 55 = 65 "px") julia] // 65 + "px" = "65px" console.log("Embedded result dim is:", dim, "\n")let div = document.createElement('div')Object.assign(div.style, {width: dim, height: dim, background: 'red'})divEmbedded result dim is: 65px
Note: let will declare a variable local to that JS area. If you wish to share state across JS areas, use var.
See Evaluating Code to understand how to evaluate JS area code.
You can insert a terminal area from the menu Area > Insert > Terminal, or it's associated shortcut.
This is a full Terminal just like the one your OS has. Why then does Glide contain one? So that you can save any work done in a terminal conveniently. You may want to include some git output, or archive a session in which you progressively developed an effective awk script.
A terminal area allows you to do this kind of work and then save the output in the document by 'dehydrating' the terminal. A term peculiar to Glide. It means simply that the terminal area is not a live terminal once it's dehydrated. It is the husk (the output) of the terminal. If you close a document which has an active terminal, it is automatically dehydrated for you.
Commands related to dehydration can be found under the Area Menu. Dehydrate Terminal will remove the terminal from the document and replace it with the session output. Dehydrate Keeping Terminal will move the terminal down and place the session output at that location.
A dehydrated area is in a frozen state when it's created. To change the contents (usually to delete unwanted content), you can unfreeze a dehydrated area using the command Unfreeze Dehydrated Terminal. Change it's content and then freeze it again using the command Freeze Dehydrated Terminal.
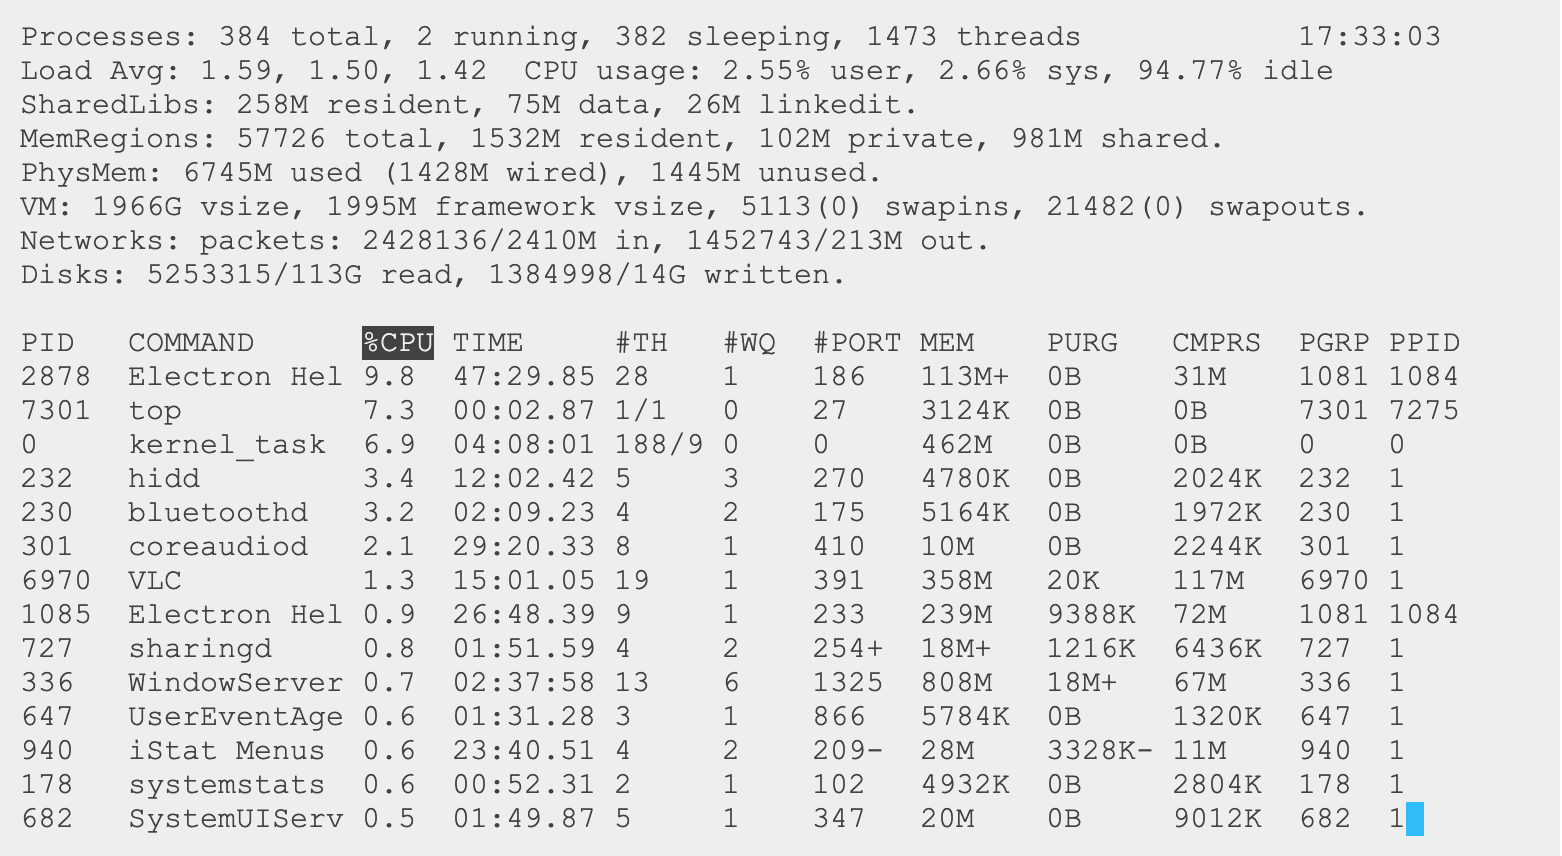
Here's a screenshot of a a terminal area running top directly in the document. And below that is what the dehydrated output looks like.
Processes: 382 total, 2 running, 380 sleeping, 1444 threads 17:33:15
Load Avg: 1.82, 1.55, 1.44 CPU usage: 2.8% user, 1.62% sys, 96.28% idle
SharedLibs: 258M resident, 75M data, 26M linkedit.
MemRegions: 57538 total, 1527M resident, 100M private, 981M shared.
PhysMem: 6775M used (1423M wired), 1415M unused.
VM: 1957G vsize, 1995M framework vsize, 5113(0) swapins, 21482(0) swapouts.
Networks: packets: 2428156/2410M in, 1452764/213M out.
Disks: 5253325/113G read, 1384998/14G written.
PID COMMAND %CPU TIME #TH #WQ #PORT MEM PURG CMPRS PGRP PPID
2878 Electron Hel 10.8 47:31.97 24 1 174 113M- 0B 31M 1081 1084
7301 top 7.0 00:03.97 1/1 0 25 3160K 0B 0B 7301 7275
301 coreaudiod 2.1 29:20.58 8 1 409 10M 0B 2244K 301 1
0 kernel_task 1.8 04:08:02 188/8 0 0 476M 0B 0B 0 0
6970 VLC 1.3 15:01.21 19 1 391 358M 20K 117M 6970 1
1085 Electron Hel 1.0 26:48.86 9 1 233 243M+ 9388K 72M 1081 1084
336 WindowServer 0.6 02:38:00 12 6 1311 810M 18M+ 67M 336 1
940 iStat Menus 0.6 23:40.57 4 2 209 28M+ 3328K- 11M 940 1
965 Syncthing 0.4 04:07.87 8 5 218+ 15M 4096B 7404K 965 1
177 karabiner_gr 0.4 11:22.01 18 1 145 5796K 0B 4252K 177 1
949 CopyClip 0.2 09:56.41 5 1 226 27M 256K 19M 949 1
676 sublime_text 0.2 20:32.56 20 1 408- 142M 20M- 31M 676 1
657 AXVisualSupp 0.1 07:20.24 5 1 215 14M 0B 7412K 657 1
920 karabiner_co 0.1 03:14.17 9 1 100 6264K 0B 4940K 920 1
§
Code from a program area or from a JS area can be evaluated. Evaluation commands can be found under the Eval menu. See the "shortcuts" dictionary in the default configuration for associated shortcuts.
The command Eval Area will evaluate whatever code is selected at the time of evaluation. If nothing is selected the entire content of the code section is evaluated. The evaulated result appears immediately below the code.
On each evaluation the previous result is replaced with the new result. To preserve previous results you can use the command Eval Area Preservering Log. This will append results of further evaulation instead of replacing the old result.
You can also traverse the entire evaluation history. Previous Eval temporarily replaces the contents of code and result sections with the code and result of the last evaluation. Repeated applications will go all the way back to the first evaluation. Next Eval will move the history in the opposite direction, till the most recent version of the code appears.
You can edit the contents of any previous evaluation and evaluate it. It's safe to do so. The edit will be added to the end of evaluation history ensuring all previous evaluation history is always preserved.
When you open an existing glide document, you may want to re-evaluate certain areas to continue where you left off. This can be tedious to do manually over and over again. To get around this, you can use the commands Mark Area and Unmark Area. Marking areas allows you to evaluate all of the marked areas in sequence using Eval Marked Areas. Marks are stored with the document, so marking and unmarking an area are persistent operations.
Eval All Areas will evaluate all program and js areas in the document in sequence from start to end.
While evaluating multiple areas, or areas with long running computations, Show Currently Evaluating Area will scroll the relevant area into view. If a REPL gets stuck in an unrecoverable state, you can restart it with Restart Area Program.
If the result of evaluating code in a JS area is an HTML DOM node, then the result is output literally. That is the DOM node is placed in the result section. This is a special feature of JS areas allowing audio/visual output. See JS area for details.
To output any other language audio/visually you must embed it in a JS area. See Embedding/Mixing Multiple Languages.
Just as a Unix shell allows piping output from one program into another, linking them into a data processing chain; Glide allows embedding output from one REPL into another.
This is best explained with some examples.
Let's say we have some simple lisp code:
xxxxxxxxxx(+ 1 1)2
?
?
But for some reason let's say it's missing the constant π and we need it for the computation. We can embed the value of π from another language that happens to have it.
xxxxxxxxxx(+ 1 1 <js Math.PI js>)5.141593
?
?
There's a lot going on here. First off, the tags <js and js> will introduce a JavaScript context. Just as when in a JS area, this code is executed within the context of the glide document itself. The output of the embedded code then replaces the entire delimited section.
This expansion process can be stepped through easily using the command Expand Next Embedded Code from the Eval menu. The example code expands thus:
xxxxxxxxxx(+ 1 1 <js Math.PI js>)(+ 1 1 3.141592653589793)
You can have multiple embeddings in the same piece of code:
xxxxxxxxxx(+ 1 1 <js Math.PI js> 100 <js Math.E js>)107.85988
?
?
Each embedding is expanded left to right in order.
xxxxxxxxxx(+ 1 1 <js Math.PI js> 100 <js Math.E js>)(+ 1 1 3.141592653589793 100 <js Math.E js>)
xxxxxxxxxx(+ 1 1 <js Math.PI js> 100 <js Math.E js>)(+ 1 1 3.141592653589793 100 2.718281828459045)
It's also possible to nest embeddings. In this case, the innermost (and the leftmost) embedding is expanded first.
Turns out Common Lisp has PI after all. But doesn't have E! Here's the contrivance with a nested code example:
xxxxxxxxxx(+ 1 1 <js Math.E + [cclq PI cclq] js>)(+ 1 1 <js Math.E + 3.141592653589793D0 js>)
The first expansion looks ok. Let's expand further.
xxxxxxxxxx(+ 1 1 <js Math.E + [cclq PI cclq] js>)(+ 1 1 SyntaxError: Invalid or unexpected token
)
)
What happened? When Common Lisp evaluates PI, it's textual output is 3.141592653589793D0.
Note that it ends in D0. This is not a valid JavaScript representation for a number.
This brings us to an important point. The expansion process of embeddings occurs lexically. It's exactly as you would copy the output from the evaluation and paste it in your code. There is no runtime sharing of state or interprocess communication occuring here.
An easy solution for this particular code is:
xxxxxxxxxx(+ 1 1 <js Math.E + [cclq (coerce PI 'single-float) cclq] js>)(+ 1 1 <js Math.E + 3.1415927 js>)
Coercing the value to a single-float type, makes the output not have the D0 suffix, which JavaScript is happy to accept as a valid number token.
xxxxxxxxxx(+ 1 1 <js Math.E + [cclq (coerce PI 'single-float) cclq] js>)7.8598747
?
?
This is a very specific solution. A more general solution that is commonly applied when embedding languages is data marshalling. Converting the output of the embedded language (the embedee) to a format that is easily accepted by the host (embedder) language.
xxxxxxxxxx(+ 1 1 <js Math.E + JSON.parse([cclq (cl-json:encode-json-to-string PI) cclq]) js>)7.8598742
?
?
Here PI is converted to a JSON string in Common Lisp and then converted back to a number from that string in JavaScript. Note that the value is slightly different than the previous result that used a single-float, since the double-float precision is not lost.
The [cclq and cclq] tags embed Clozure Common Lisp. The name of this binary is cclq. Usually it is ccl, but I use a custom ccl image preloaded with Quicklisp which I've named cclq. My glide configuration for Clozure Common Lisp uses this custom image binary.
In general, to embed any particular language use that language's configured command_name (REPL binary) with square brackets to nest that language. So if you use Ruby and the interpreter is irb you would use the tags [irb irb] to embed any ruby code. Similarly to embed python you might use [python3 python3]. See Configuring Programs.
Embedding JavaScript is a bit different. Since it is the host language and executes in the context of the document, it has no associated command_name. To indicate this distinction, the js embedding uses angle brackets instead of square brackets. So the tags to embed document JS are <js and js>.
Within an embedded code section the language mode is automatically set, so the syntax highlighting and indentation will function correctly. Due to performance limitations this is limited to 4 nested levels.
The command Expand Next Embedded Code will progressively step through embeddings, expanding the innermost left-most embedding on each successive call. It will stop short of evaluating the final result. That is, once the full textual code expansion is done, and no more embedded sections remain, it will stop there. To evaluate the code, you just evaluate it like you would any other code. See Evaluating Code.
At any point while stepping through the expansion, you can use the command Expand First Embedded Code to restart the expansion process from the first embedding onwards.
A common use-case for embedding is when you have a language that contains features that are well developed but aren't available in the language that you happen to like or are working in. Say a library of arcane mathematical functions is available in X-Lang, but you are using Y-Lang for development. Solution: Embed X-Lang in Y-Lang.
A particular use-case that Glide shines at, is becoming the graphical front-end for any language via embedding in a JS area. If the output of a JS area is a DOM node, it is output not textually, but literally as an audio/visual entity. See JS area and the embedding example it depicts.
§
Glide documents support selective viewing of areas and other elements via the commands under the View menu.
Toggle Area Info places a separator between areas and adds an area type header to each area, or if already showing, hides this info. This is very helpful when working with multiple languages and formatting distinct areas.
Toggle Program Input will show or hide the input section of all program and js areas. See program areas.
Toggle Line Numbers will show or hide line numbers next to all code sections of all program, js and scratch areas.
Toggle Line Wrapping will enable or disable line wrapping of code sections of all program, js and scratch areas.
Glide has an internal logging mechanism that logs important events or errors. These logs are contained in the logger which is shown as a bar at the very bottom of the document. It's hidden by default. Instead of just being in a hidden or shown state, the logger has three view states. Hidden, minimized and maximized. Cycle Log View will cycle through these states.
§
A glide document can be exported as an HTML file from the menu File > Export as HTML.
The exported page looks exactly like the glide document. If the theme "system" is active while exporting, then the html page will also respond to system dark mode. See Custom Theming to understand what "system" theme means and how to use it.
The exported html is content-only. That is, even though it looks like a glide document, it has none of the behaviour of a glide document. Nothing can be evaluated, and if you've added any behaviour to the document using script elements, those will be inactive as well.
§
The following is the entire default configuration that Glide uses internally. It contains the default themes, settings and keyboard shortcuts. And as is obvious, there are no default configured programs. Also see Configuration.
xxxxxxxxxx{ programs: [], themes: { 'Default Dark': { "bg": "#2d2d2d", "text": "#ddd", "highlight": "#555", "lines": "#444", "link": "#ffaf34", "secondary-text": "#999", "secondary-highlight": "#c9bc9f", "default-area-width": "800px", "font-family": "times new roman, serif", "font-size": "16px", "small-font-size": "12px", "code-bg": "#2d2d2d", "code-text": "#aaa", "code-string": "#988a6a", "code-number": "#a82828", "code-comment": "#586E75", "code-keyword": "#666", "code-name": "goldenrod", "code-caret": "dodgerblue", "code-selection": "#094352", "code-font-family": "primamono, monospace", "code-font-size": "14px", "terminal-theme": "default", //xterm-theme module "terminal-bg": "#050505", "terminal-font": "courier new, courier, primamono, monospace", "logger-bg": "#000", "logger-text": "#ddd", }, 'Default Light': { "bg": 'white', "text": '#111', "highlight": '#ddd', "lines": '#ddd', "link": 'blue', "secondary-text": '#777', "secondary-highlight": '#555', "default-area-width": "800px", "font-family": 'times, monospace', "font-size": "16px", "small-font-size": "12px", "code-bg": 'white', "code-text": '#111', "code-string": '#715d30', "code-number": '#a82828', "code-comment": '#81a5b1', "code-keyword": '#666', "code-name": "#518e00", "code-caret": "dodgerblue", "code-selection": '#ddd', "code-font-family": 'primamono, monospace', "code-font-size": "14px", "terminal-theme": "PencilLight", "terminal-font": "courier new, primamono, monospace", "terminal-bg": "#eee", "logger-bg": "#f9f9f9", "logger-text": "#333", } }, settings: { "theme": "system", "system-dark-theme": "Default Dark", "system-light-theme": "Default Light", }, shortcuts: [ { "shortcut": "shift+mod+g", "function": "generic-area.insert" }, { "shortcut": "mod+alt+g", "function": "program-area.insert_scratch" }, { "shortcut": "shift+mod+j", "function": "js-area.insert" }, { "shortcut": "shift+mod+t", "function": "terminal.insert" }, { "shortcut": "alt+mod+i", "function": "area.toggle_info" }, { "shortcut": "alt+mod+x", "function": "area.cut" }, { "shortcut": "alt+mod+c", "function": "area.copy" }, { "shortcut": "alt+mod+v", "function": "area.paste" }, { "shortcut": "shift+alt+mod+backspace", "function": "area.remove" }, { "shortcut": "alt+mod+6", "function": "area.split" }, { "shortcut": "alt+mod+5", "function": "area.merge_above" }, { "shortcut": "alt+mod+7", "function": "area.merge_below" }, { "shortcut": "mod+alt+up", "function": "area.display_only_code_sections" }, { "shortcut": "mod+up", "function": "area.display_only_generic_areas" }, { "shortcut": "mod+down", "function": "area.display_all_areas" }, { "shortcut": "mod+.", "function": "area.goto_next_area" }, { "shortcut": "mod+,", "function": "area.goto_previous_area" }, { "shortcut": "shift+mod+esc", "function": "area.goto_last_area" }, { "shortcut": "mod+esc", "function": "area.goto_first_area" }, { "shortcut": "mod+alt+.", "function": "area-styling.increase_column_count" }, { "shortcut": "mod+alt+,", "function": "area-styling.decrease_column_count" }, { "shortcut": "shift+mod+.", "function": "area-styling.increase_default_width" }, { "shortcut": "shift+mod+,", "function": "area-styling.decrease_default_width" }, { "shortcut": "shift+alt+.", "function": "area-styling.increase_width" }, { "shortcut": "alt+shift+,", "function": "area-styling.decrease_width" }, // full_width and default_width have no default shortcuts. { "shortcut": "shift+alt+0", "function": "area-styling.default_font_size" }, { "shortcut": "shift+alt+=", "function": "area-styling.increase_font_size" }, { "shortcut": "alt+shift+-", "function": "area-styling.decrease_font_size" }, { "shortcut": "mod+j c", "function": "area-styling.use_code_font" }, { "shortcut": "mod+j t", "function": "area-styling.use_text_font" }, { "shortcut": "mod+j a", "function": "area-styling.align_left" }, { "shortcut": "mod+j s", "function": "area-styling.align_center" }, { "shortcut": "mod+j d", "function": "area-styling.align_right" }, { "shortcut": "mod+j j", "function": "area-styling.justify" }, { "shortcut": "shift+mod+alt+,", "function": "area-styling.default_style" }, { "shortcut": "shift+mod+alt+.", "function": "area-styling.custom_style" }, { "shortcut": "mod+shift+l", "function": "generic-area.create_link" }, { "shortcut": "mod+alt+shift+l", "function": "generic-area.open_link" }, { "shortcut": "mod+shift+n", "function": "generic-area.create_name" }, { "shortcut": "shift+mod+i", "function": "program-area.toggle_input" }, { "shortcut": "mod+g", "function": "program-area.toggle_gutters" }, { "shortcut": "mod+k mod+w", "function": "program-area.toggle_wrap" }, { "shortcut": "mod+'", "function": "program-area.mark" }, { "shortcut": "option+mod+'", "function": "program-area.unmark" }, { "shortcut": "mod+alt+j", "function": "program-area.goto_currently_evaluating_area", }, { "shortcut": "mod+e", "function": "program-eval.eval_area" }, { "shortcut": "mod+enter", "function": "program-eval.eval_area_preserve_log" }, { "shortcut": "mod+shift+e", "function": "program-eval.eval_marked_areas" }, { "shortcut": "alt+mod+shift+e", "function": "program-eval.eval_all_areas" }, { "shortcut": "shift+alt+b", "function": "program-eval.previous_eval_history" }, { "shortcut": "shift+alt+f", "function": "program-eval.next_eval_history" }, { "shortcut": "mod+alt+shift+r", "function": "program-eval.restart", }, { "shortcut": "alt+mod+e", "function": "program-embed.expand_next_embedded" }, { "shortcut": "alt+shift+e", "function": "program-embed.expand_first_embedded" }, { "shortcut": "shift+mod+alt+p", "function": "terminal.dehydrate" }, { "shortcut": "shift+mod+p", "function": "terminal.dehydrate_keeping" }, { "shortcut": "mod+j u", "function": "terminal.unfreeze_dehydrated" }, { "shortcut": "mod+j f", "function": "terminal.freeze_dehydrated" }, { "shortcut": "alt+mod+l", "function": "log.cycle_view", }, { "shortcut": "mod+z", "function": "history.undo", }, { "shortcut": ["shift+mod+z", "mod+y"], "function": "history.redo", }, ]}Last updated 1st Nov 2021 by Varun A
•
This document was created using Glide.